Before and After Photos: Home Improvement Projects and Renovations – Crawlspace, Guest House, Yard Work, and More

The current and past projects we have worked on or are currently working on include the crawlspace and guest house redo, along with the yard work.

I still have to work on the Jukebox along with 2 inside doors. Where does the time go. I’ve been here over 4 years already! I just wanted to post some before and after photos.
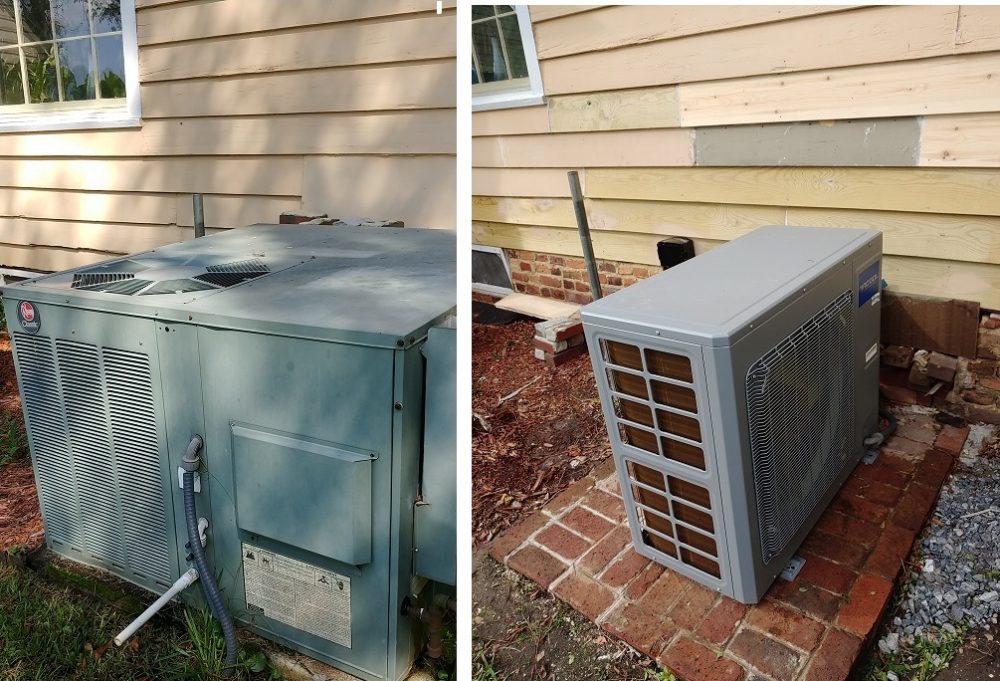
Old energy hog gas furnace and 3 ton AC. Replaced with 3 ton heat pump high efficiency model. You have to say wow to the difference in physical size.

I wish I had after photos to show all the ductwork that was replaced, I do have photos of the big pile on the sidewalk.
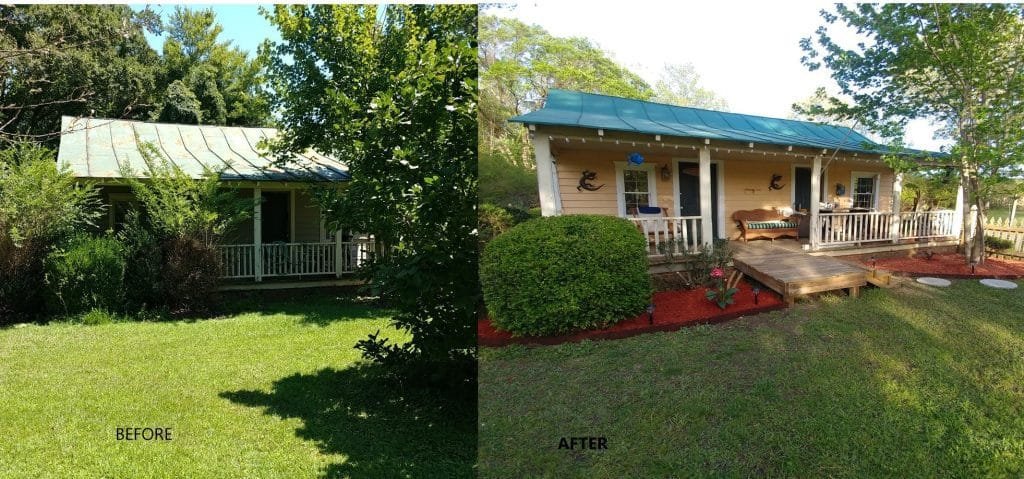
guest house before and after

Photo on left was taken on a few days after my closing before I cut down the overgrown shrubs.
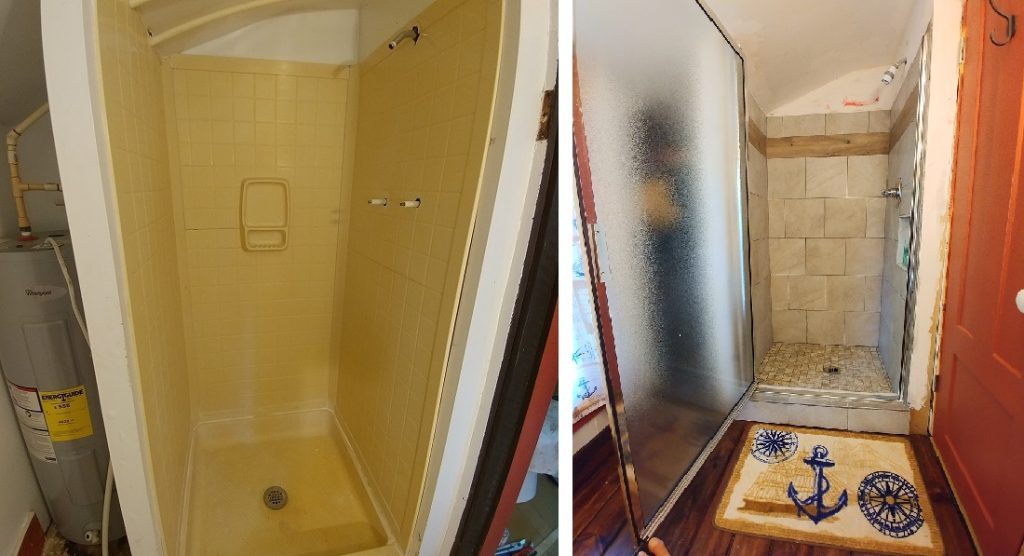
Shower then and now

On the left the guest house plastic shower, note the hot and cold water pipes running across the ceiling, this was a big project as the floor had to be rebuilt and plumbing completely rerouted and replaced, along with the walls. Also it was enlarged as the electric hot water tank was removed and replaced with a wall mounted “On demand” heater.
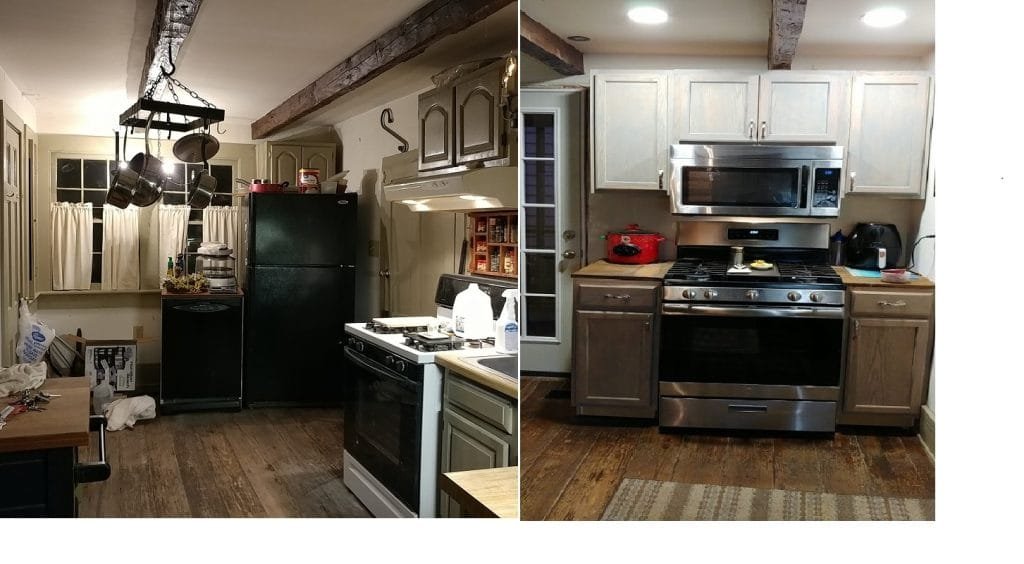
Sove moved

Perhaps the most difficult job was removing the double window and installing a door and relocating the stove, the left photo shows the window and the old location of the fridge and roll around dishwasher that hooked up to the faucet.

You can see on the right the new stove location and door, along with upper and lower cabinets, the old location of the stove has been replaced with a built-in dishwasher.
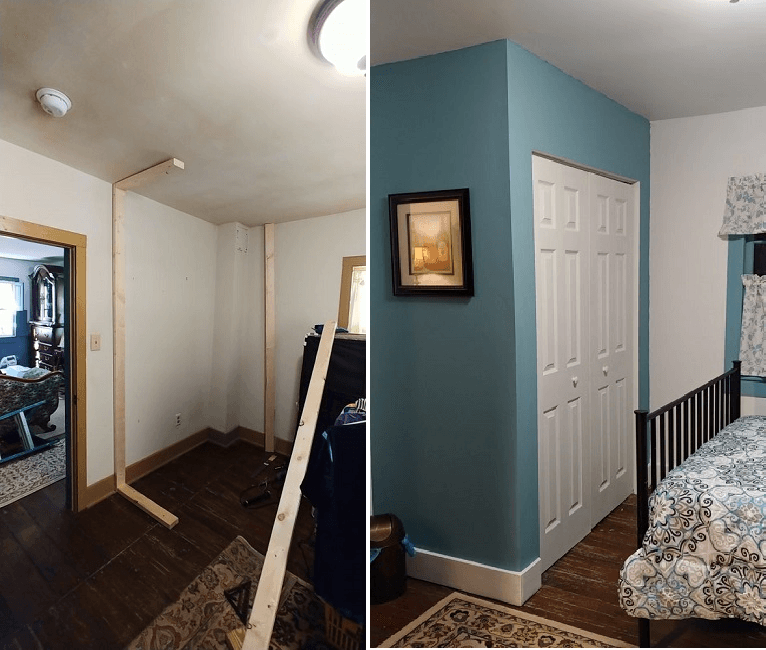
closet added

These old houses were not designed with lots of closet space, the spare bedroom needed a closet, on the left is the wall I chose to use, I think it came out pretty well. new paint was also needed.
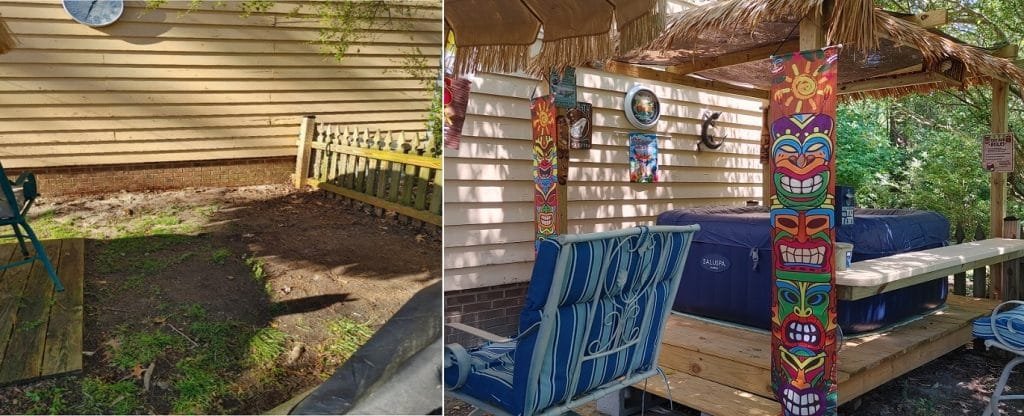
New Spa located behind garage

What was pretty much dirt behind the garage wound up being a good place to build a deck for a hot tub we purchased, so some relocating for the gas grille and a storage bin had to be done, this really has worked out well for us.

The Spa Hot Tub Project: Completed, Tips for Installation and Usage

The Spa Hot Tub Project has been completed (well almost) and the water temp was set to 101 degrees, now the muscle and joint pains can get some relief.

Well let’s start with the purchase, I was not looking for spa tub but came across a one day deal for $317 was kinda hard to turn down since the regular price was $500. So I clicked YES and ordered it. Now where to put it? Where to get power? Where can I place 2,000 pounds (with 220 gals of water) Ok behind the garage where I could build a raised deck and add power from the wall right behind the garage.

I had to move the gas grill and ladder hanging outside the garage along with the outdoor storage bin, but not that much really, plus I wanted rain water to still make it into the ground for the tree roots.

Well the project went smooth, I used all pressure treated wood, 2×6 and 4×4’s with 2 added to the middle for extra support all down about 2 feet with cement.( I used fast set cement pour into hole and just add water). The deck boards along with the 2x6s were all 8 footers so the deck size was also about 8′ x 8′ with the price of wood nowadays the deck cost more than the tub!

The electrical outlet was added (GFCI) with a “In-Use” cover, I added 1/2″ foam board to help pad the tub and add some insulation for the hot water.

We used tap water to fill it and it showed about 57 degrees from the start, yesterday we were in it at 100 degrees and it was great! It does take some time to get hot, I’m seeing about 1.5 degree increase every hour. My guess is the heater can’t be that strong to allow the unit to use a standard 15 amp 120v outlet, As I recall it uses about 12 amps of power with the heater on.

Now we can continue the work around the house and get some spa therapy as needed.